Showing posts with label Soapmaking. Show all posts

Friday, November 12, 2010

Soap Art ~ Meet "Bubbles"!


I thought I had finished my very first, needle-felted, SHEEP SOAP.  However, now that I've seen the photos, I think I will add eyes and a nose/mouth. 


 I am, however, pretty pleased with "Bubbles"!  She's the first, needle-felted, soap art that I have done and I think she is adorable.  There's no "pattern" ~ I just made her up as I went along.


She is 100% natural ~ all Shetland Wool and homemade Goat Milk Soap!


I had so much fun making her.


Once she has her eyes, nose and mouth, Bubbles will be available for purchase in my "Sheep Hugs & Soap Suds" on-line store.


I'm thinkin' I'll price her at $15.00

DREAM says...


"Fifteen dollars for a Shetland Sheep?  How embarrassing!  What I want to know is how Mom got that soap inside of Bubbles...? "

It was magic, Dreamer.
Pure Magic!

;-)


Thursday, October 14, 2010

Simply Soap...


Who knew that soap making could be so much FUN and such a creative outlet?
Below are a few samples of what this shepherdess has been up to:

The lighter colored bars on the bottom left of the above photo are orange/oatmeal.  The darker bars in the front two rows are unscented, the reddish bars and hearts are cinnamon/clove.

I've been practicing with ways of wrapping my soaps for sale.
I like this 'plain' style with brown paper and a raffia tie.  Of course I'll have to make up labels with my shop name (what do you think of "Bluff Country Treasures"???) and ingredient lists.  All of my soaps will be all natural and animal friendly.

This is a sample of my Orange/oatmeal bar, wrapped and ready to sell.
It smells heavenly!  Just a light hint of orange and this soap is a skin conditioning bar with ground oatmeal (that I grind with a cup and pestle!), for a gentle exfoliant.  I love it!

I had all sorts of fun playing with some silicone molds for shaping my bars!

This recipe is for Coffee/Mocha hardworking scrub bar.
It contains coarse ground coffee (gourmet!) grounds that scrub even the greasiest, dirtiest hands and even removes oders.  I've added skin conditioning oils to soften the skin after scrubbing it clean.  The chocolate, coffee and vanilla, all natural essential oils give it a mouthwatering scent of Mocha!  I swear ~ I'm going to have to put a "do not eat!" label on this soap because it smells SO delicious!

The small, rectangular bars (about 2 oz) look like fudge.
I think the little sample sized Teddy bears are adorable ~ they're just under an ounce each.

Above, I have a teddy bear sitting on a "log"  that is actually a cylinder that I cut from a mold that I made from an empty toilet paper tube!

And of course I LOVE the little sheep!
She's the first one that I made and I sprayed the mold with "Pam/olive oil" but I think it would be better if I don't spray the mold next time.  I'll find out in a few hours because I'm going to MAKE SOAP this afternoon...

This photo of a full sized bar shows the coffee grounds that give this soap it's scrubbing power:

I can either sell the bars with the uneven textured top, or trim it off for a more 'traditional' looking bar of soap.  I may just offer them both ways.  You get a little extra with the rough edge, plus I like the primitive look of it.

I'm going to have to take time off from soap making long enough to work on a web site/page that promotes my new enterprise!  I was originally going to call my business "Bluff Country Bounty" ~ thinking that the products will be the bounty of the area that I live in which is known as the Bluff Country.  But, I'm not sure that people will really know what I mean by 'Bounty'.  Someone looking for homemade soaps or wool or yarn, wouldn't automatically click on a site called BC Bounty.  But I think "Bluff Country Treasures" more accurately describes what I'll be offering and people might be more likely to check it out.
What do  you think?

I would truly appreciate your opinions!
In fact, if you have any other name suggestions, I'd be happy to hear them!

Gonna go make soap now...

;-)

DREAM says...

Apparently, Dream isn't going to say anything today!  I've been fighting with Blogger throughout this entire post.  It won't let me download photos the way that I normally do.  Now, I can't get it to let me download a picture of Dream at ALL.  
:-(

Sorry Dreamer!

Sunday, October 03, 2010

Now we're cookin'...
Step three ~ Cooking your hot processed soap


I guess while my latest batch of soap is cooking in the crockpot ~ I'm making Cinnamon - Clove with a touch  of orange ~ I thought I'd work on the post for the third step.
Today, we're going to cook your soap!

Well, actually, if you're following along, you should be doing all of this in one day.  Except, of course, you could get your supplies together the day before but who has room to leave all that stuff on the kitchen counter for a day?

O.K.
Cooking soap in the Crockpot:


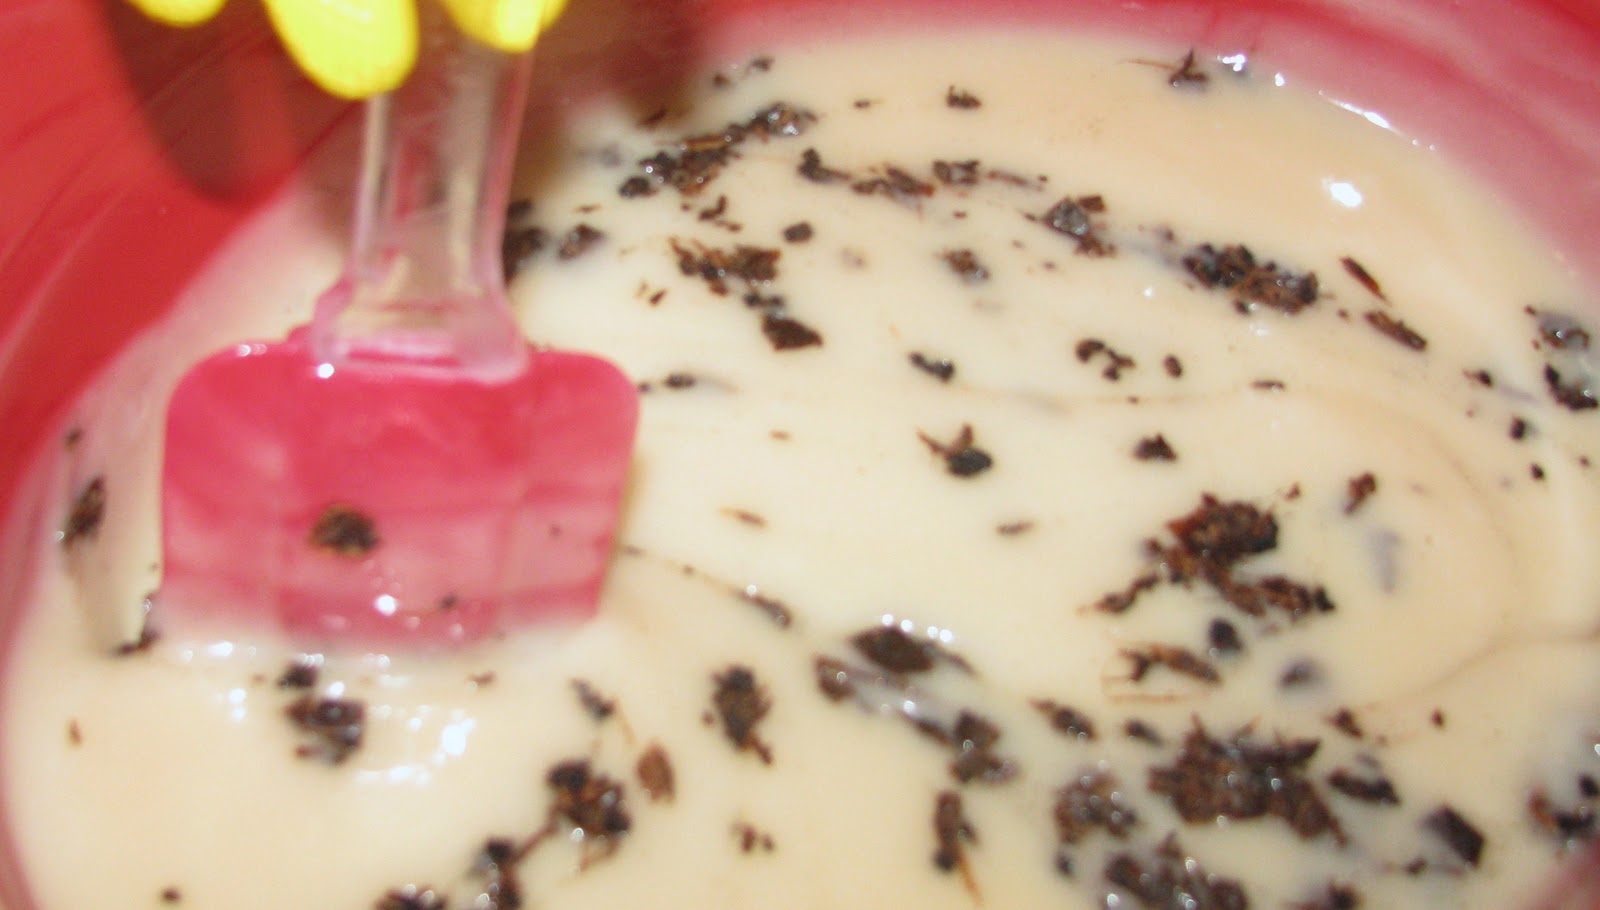
We left off yesterday when our soap had achieved trace.
It was thick enough that the trails formed when stirring, remained on the surface for a few seconds, resembling cake batter.  At that point, we added the grated vanilla beans and turned the crockpot on high.

Be sure and cover the crockpot.
Keep the cover on throughout the cooking process.


I like to record the time that I start cooking my soap.  In hopes that someday, that will give me a rough idea of how long to expect it to need to cook. 

This is what it looked like after about 10 minutes:


I just checked today's batch and it looks about the same after 10 minutes.

While your soap is cooking, you could prepare some molds to put it in once it's done.
You can use common household items such as a cardboard box, lined with freezer paper (shiny side up).


After about 30 minutes, your soap should resemble this:


I just checked today's batch and it's close to this. 
 It reminds me of a stuffed crust, cheese pizza!

You'll see the outer edges bubbling up and turning over on themselves.  I noticed that mine was cooking more on one side than the other so I rotate the crockpot a half turn each time I checked it.  I guess my kitchen counter (or whole kitchen!) is crooked. 
You do not need to take the cover off at this time.  If your crockpot doesn't have a clear lid, it is okay to peak inside to check progress, but don't stir the soap yet.


Once the whole batch looks like it has folded over on it's self, (mine took a little over an hour) and there is no puddle of uncooked stuff (clearly, a scientific term)  in the middle, you can remove the cover and stir your soap.  You may notice that the soap seems to rise up, inside the crockpot, as it cooks.  This is normal.  This is why you want to keep a close eye on it.  It could possibly rise high enough to pop the lid off of the crockpot!
Then you have a REAL mess.


The above photo is the soap right after I stirred it. 
The texture is interesting when you stir the soap.  Real 'airy' and kind of sticky ~ it made me think of a blend of cotton candy and toffee!
(Mmmmm  ~ I'm getting HUNGRY!)

Put the cover back on and continue cooking.


The soap will rise much more quickly the second time.
Watch it closely. I set my kitchen timer and check it every 10 minutes.

I did have time to start a batch of pumpkin spice cookies


 ;-)

As the soap rises and turns over on it's self the second time, you'll notice it is getting a shiny surface.  It almost looks like it's mixed with Vaseline.  That is what you are looking for!


See how shiny?
When it has completely turned over again and is all shiny, your soap should be done.  Remove the cover and stir the soap.


This soap turned dark because of the bits of vanilla bean added to it prior to cooking.   Vanilla scented Essential Oil  will have the same effect. 

You can test your soap to make sure it's done by taking a little bit that has cooled off of the spoon.  Roll it into a small ball.  It should feel waxy.   The sure-fire test is the pH test.  To make sure there is no more active lye left in the soap, you can wet the ball of soap that you made and run a pH test strip over it.  Another test ~ the one that I use because so many people recommend it ~ is to touch the soap with the tip of your tongue.  If there is still active lye, the tip of your tongue will tingle.  If it tingles, your soap is not done and you should put the cover back on for 10 more minutes and then test again.  Once your tongue doesn't tingle or your pH strip turns blue, your soap is done and safe to use.  For my first three batches of soap this has taken anywhere from an hour and a half to two and a half hours.


My cookies were done as well!


Now is the time to add your fragrance oils. 
I use "Essential Oils" because they last longer, are natural and work better than "fragrance oils" with hot process soap. I didn't add any fragrance to this soap as I wanted to try an unscented batch. 

I wish I had used a fragrance because I don't like the smell of this unscented batch.

QUICKLY   glop (that's the scientific, soapmaker's term for 'put') your soap into your prepared mold/s.  I opted not to use the box I had prepared because I didn't have enough soap to make a thick enough bar in that big of a space.  Fortunately, I have a couple of silicone molds that I bought, online.


I also used an empty toilet paper roll to make some tiny, round bars.
I figure they'll be good for samples.
The same method applies:  spoon the soap into the tube, tamp down, spoon more, tamp more, press from the top.  You can see that a little seeped out the bottom of the tube.  That's not a problem, it'll come off when we take the soap out.


You want to get the soap into the molds fast because it will quickly become too thick to shape!  As you add the soap to the mold, tap it down on the counter top to remove air bubbles.  Once you have all of the soap in the mold/s, put a piece of plastic wrap (or waxed paper) over the top and press down, gently to further compress the soap.  Use your hand, over the plastic wrap, to smooth the surface of the soap as much as you can.  Hot Process soap is not as smooth as cold process soap.  It is more of a primitive-type bar.  I, personally, like that. 

A good afternoon's work!


Set your molds on a cooling rack and let them sit over night.
The next morning, you can remove the soap and cut it into bars!  (or whatever shape you wish ~ think cookie cutters)

Removing the soap:


Loosen the mold
If you used a tray or box lined with freezer paper,
lift it out of the box.

After loosening all 4 sides, the soap should pop right out of the silicone mold.


To remove from paper TP or papertowel tubes, simply peel off the paper tube:


And slice:


I bought a soap cutter (because I'm so rich) 
*I wish there was a sarcasm  key on my computer!"
A butcher knife would work but not as nicely.

My cutter has a ruler on the cutting edge and I used that to score the loaf at one inch intervals so I'd have uniform bars of soap.


Then I cut along the scores:


Even though hot processed soap is safe to use, once it has cooled, it is better to let it stand and "cure" for a week or two.  During this time, any excess moisture will evaporate, leaving you with a nice, hard bar of soap that will last a LONG time. 


It also makes your house smell good ~ if you used an essential oil to scent your soap.
I'm adding cinnamon, clove and orange to the batch that's cooking today!
MMMMMMMmmmmmmmm!

***PLEASE NOTE***


I am by NO means an expert soap maker.  I am learning as I go along.  Feel free to  leave questions or comments in the comments section of any of the soapmaking posts.  If I don't know the answer, I'll try to help you find someone who does!

Be careful when working with lye!  I do the "tongue test' to see when my soap is done.  If you chose to use this method, you do so at your own risk.

The following are a list of helpful links.  There are MANY more out there.  You can "Google" just about anything!    I hope you enjoyed our soapmaking adventure!

Useful  Links:

There are SO many more links out there.  Blogs too!  But my soap is done and I need to go set down pallets because I've got HAY coming for my sheep!

DREAM says...


"Hay? 
Did she say HAY???
Oh, happy dance!  I get hay!  I LOVE hay!
I thought we were NEVER  going to get hay again!
Come on, Mom!  You better get those pallets down.  I've got HAY coming!"

I'm on my way, Dreamer...

Saturday, October 02, 2010

Step two ~
Making Crockpot goat milk soap...


OK
In yesterday's post, we got everything ready to make our first batch of goat milk soap in a crockpot.  Preferably a pretty, RED crockpot.
;-)

Today, we're going to go ahead and MAKE the soap.
The first thing to do is to weigh your frozen goat milk:


I freeze my goat milk in zippered freezer bags.  You want it frozen so that the milk doesn't scorch when you add the lye.  It helps if you freeze it with the bag lying flat ~ that way it is easier to break up the frozen milk when you go to add the lye.

Next, measure (weigh) the lye:


Of course, you WILL BE wearing your
safety equipment when you are working with lye.


I like to put the bowl (stainless steel) that I am mixing the milk and lye together in, into the kitchen sink that I have put cold water and ice cubes into.
This is the slushy/frozen goat milk that I broke up into smaller pieces while it was still in the ziplock bag.


VERY  slowly add the lye to the goat milk.
NEVER add the milk to the lye!  It will explode!  Add the lye,
a little bit at a time, while constantly stirring the goat milk. 


 The mixture will become hot
(not too hot because we're using frozen goat milk and mixing it in a bowl sitting in ice water) and the goat milk will thaw.  It took me almost ten minutes to add the lye.  I might be being extra cautious but my milk doesn't scorch that way.

Keep stirring constantly until the milk (to which you are adding the lye ~ NOT the other way around) is completely blended with the lye and the mixture looks smooth and creamy.


Set the milk/lye mixture aside on the counter.

Next, weigh your fats and oils:


Melt any solid oils (such a Crisco, lard or coconut oil) and add to the liquid oils.
I didn't quit get my Crisco completely melted before adding it to the other oils. 
SHAME ON  ME!


It wasn't really a big deal ~ I just put the stainless steel bowl on the stove for a half-minute to finish melting the Crisco.  Stir oils to blend.

Since I chose not to use scented oil in this recipe, I'm grating  two whole vanilla beans
to add texture and scent. 


I had no idea how difficult it is to grate vanilla beans!


Don't let small obstacles deter you...


(that would be the blade of a steak knife that I'm using to finish "grating" the vanilla beans.)
Be creative!

Set the grated vanilla beans aside.
Now, pour the blended oils into the beautiful, red,  crockpot.
At this point, the crockpot has NOT been turned on. 
No additional heat is needed.
Yet.


Slowly, add the goat milk/lye mixture, stirring constantly.


Ladies and gentlemen ~ you are making soap!
As you continue to stir the milk/lye/oils mixture, the lye interacts with the oils in a process called "sopanification". 


The mixture will become thicker and creamy looking.
Keep stirring.  If you want to speed things up, you can alternate stirring with a spatula with using a "stick blender":


I hand stirred for about two minutes and then used the stick blender for about 15 seconds.
Keep stirring for about ten minutes


alternating between the spatula and the stick blender.


The mixture will continue to thicken. 
 Don't overuse the stick blender or it will thicken too quickly.

When the mixture is thick enough that it leaves 'tracks' in the surface when you stir it, or droplets remain on the surface, instead of disappearing instantly, you have reached "TRACE".  If you do not have a stick blender and do all of your stirring by hand, it will take considerably longer.
almost there...


Trace is the "point of no return" in the soap making process.
 Once your soap "traces", the mixture will not separate back into the original oils and lye & milk. 
It is now soap!


Once the soap reaches trace, 90% of the lye has been consumed.  If we were making cold process soap, the mixture would be poured into molds now and allowed to "cure" for 6 to 8 weeks.  During that time, the remaining lye is neutralized.

   In hot process soapmaking, the rest of the lye is neutralized by cooking the soap.  By making soap in this manner, the product is safe to use as soon as it's cooled.  For this recipe, we will cook the soap in the crockpot.

I added the grated vanilla beans to the soap at trace. 


In retrospect, I could have waited and added them after the soap had cooked.  By doing so, I might have avoided the beans turning the mixture dark.

Now is the time that we are going to finally  turn on the crockpot!

to be continued tomorrow...


LinkWithin

Blog Widget by LinkWithin